Introduction
I am currently on this Journey of improving my vocabulary, and one of the ways to do that is by reading. As a developer I read a lot of the time from my computer, maybe I am going through the documentation for a certain technology or I am reading a random article. I realized that a lot of the time I would want to look up the meaning of an unfamiliar word but I would always be redirected to the Google search page.
This was quite uncomfortable for me as I found it distracting to move from one tab to another and I would lose my train of thought while reading. This issue for me, birthed the idea of this Chrome extension. An extension that would enable me to check for the meaning of words without leaving the current webpage to look up the word on Google search.
This was my first time attempting to build a Chrome extension, therefore this article is going to take you on a short journey about how I was able to overcome roadblocks and achieve the final product.
The basic skeleton for building a Chrome extension is HTML, CSS, and JavaScript, It is just like building a web application, but in this case, you have to make use of the Chrome APIs, and information about them can be found in the official documentation.
The Chrome APIs you will make use of will be determined by the functionality of your Chrome extension, so you need to have a good understanding of the project you want to build to choose your Chrome APIs properly.
Step 1
Creating a folder
I started by creating a regular Folder where I would write all my code. What makes a Chrome extension different from regular web applications is the manifest.json file.

Manifest File
The manifest file is the core of your Chrome extension without it, you have no extension. It will contain all information about your Chrome extension such as the name, the version number, the description, and URLs where your extension can work or cannot work.
    "manifest_version":3,
    "name":"Wordy Wise",
    "description":"Wordy Wise helps you to check the meaning of words on any webpage",
    "version":"1.0.0",
    "permissions":["storage", "contextMenus"],
    "host_permissions":["*://*/*"],
    "icons":{
        "128":"icon128.png",
        "48":"icon48.png",
        "16":"icon16.png"
    },
    "action":{
        "default_popup":"index.htm",
        "default_title":"Wordy Wise"
    },
    "background":{
        "service_worker":"background.js"
    },
    "content_scripts":[
        {
            "matches":[
                "<all_urls>"
            ],
            "js":["content.js"]
        }
    ]
}
If you have never built an extension before, the code above may seem very strange to you but do not worry I have got your back. Below is a quick explanation of everything in the code above signifies.
Manifest version: Chrome has released three versions of the manifest so far, so you need to be using the current version which as of the moment is version 3. The manifest version is required when you're creating your manifest file, without it, you will most definitely run into an error.
Name: you can be very creative on this one. This is the name you would like to give your Chrome extension. I named my extension "Wordy Wise", which signifies that whoever is using it will soon become very wise with Words. This is also required in your manifest file and cannot be omitted.
description: This is a short description of your extension. It could be one sentence about what problem your extension solves.
version: This is the version of your Chrome extension. The version of your Chrome extension is up to you and it can be updated as you improve your extension.
Permissions: The permissions field in the manifest file specifies the Chrome APIs your Chrome extension will be able to use. For this project, I made use of the storage API and the contextMenus API. So this would vary depending on the functionality of your project. I will explain the purpose of the storage API and contextMenus later in this article but in the context of this particular project.
Host permissions: You will be required to specify host permissions in your manifest file when using the manifest version 3. Host permissions accept an array of match patterns. These patterns specify the URLs in which the Chrome extension will be activated. In my case, I used the *://*/*, which is a wildcard pattern to match with a wide range of URLs. My goal was for this extension to work on all web pages.
Icons: You can specify three icons for your extension with varying dimensions from the largest which is 128 x 128 to the smallest size which is 16 x 16.
Action: You know that little popup that comes on your screen when you click on a Chrome extension from your toolbar. The default_popup is the html file that will be loaded when you click on the extension Icon, this is the UI for extension. The default title can be any title that you are comfortable with, this will pop up when the user hovers on the extension icon.
Background scripts: You need to specify a javascript file with the service worker as a key. Background just like the name implies is a file that runs in the background of your extension, it works behind the scenes, and it can be used to listen to certain events that occur on the webpage which could trigger specific functions of your extension. You can read more about background scripts and service workers here.
Content scripts: If you need your extension to manipulate the DOM of a particular webpage, you need to make use of the content script. For instance, if you need your extension to change the background color of a webpage when it is activated, you will write this code in your content script file.
The Project Workflow
Now this Chrome extension has an easy workflow:
Allow users to select a word from a webpage.
Take that value clicked by the user.
Fetch the meaning of the word.
Display the meaning to the user.
Word selection via Chrome ContextMenus
This Chrome API allows you to customize Google Chrome's context Menu by adding your extension to it. A context menu is simply the menu that pops up when you right-click on parts of your webpage.
To create your context menu Item, you have to create an object. The context Menu object takes in different properties but for this project , I only had to use three which were:
an id
a title
context.
The context will determine what actions will occur in your browser that would make your contextMenuItem will be available when you right-click the mouse.
My idea was to make my ContextMenuItem with the title "Wordy Wise" to appear on the contextMenu after a user highlights a particular text on a webpage. When building Chrome extensions, highlighting a text is synonymous with the "selection" context type.
There are several context types you can use, learn more about them in the documentation.
let contextMenuItem = {
    "id":"wordyWise",
    "title":"Wordy Wise",
    "contexts": ["selection"]
}
The Chrome contextMenus API has the following methods;
Create
Remove
RemoveAll
Update
Since I wanted to create a new contextMenuItem, it was only right that used the create method, which takes in two parameters, an object and a callback function.
chrome.contextMenus.create(
  createProperties: object,
  callback?: function,
)

chrome.contextMenus.create(contextMenuItem)
The object refers to the initial object we created earlier called "contextMenuItem".

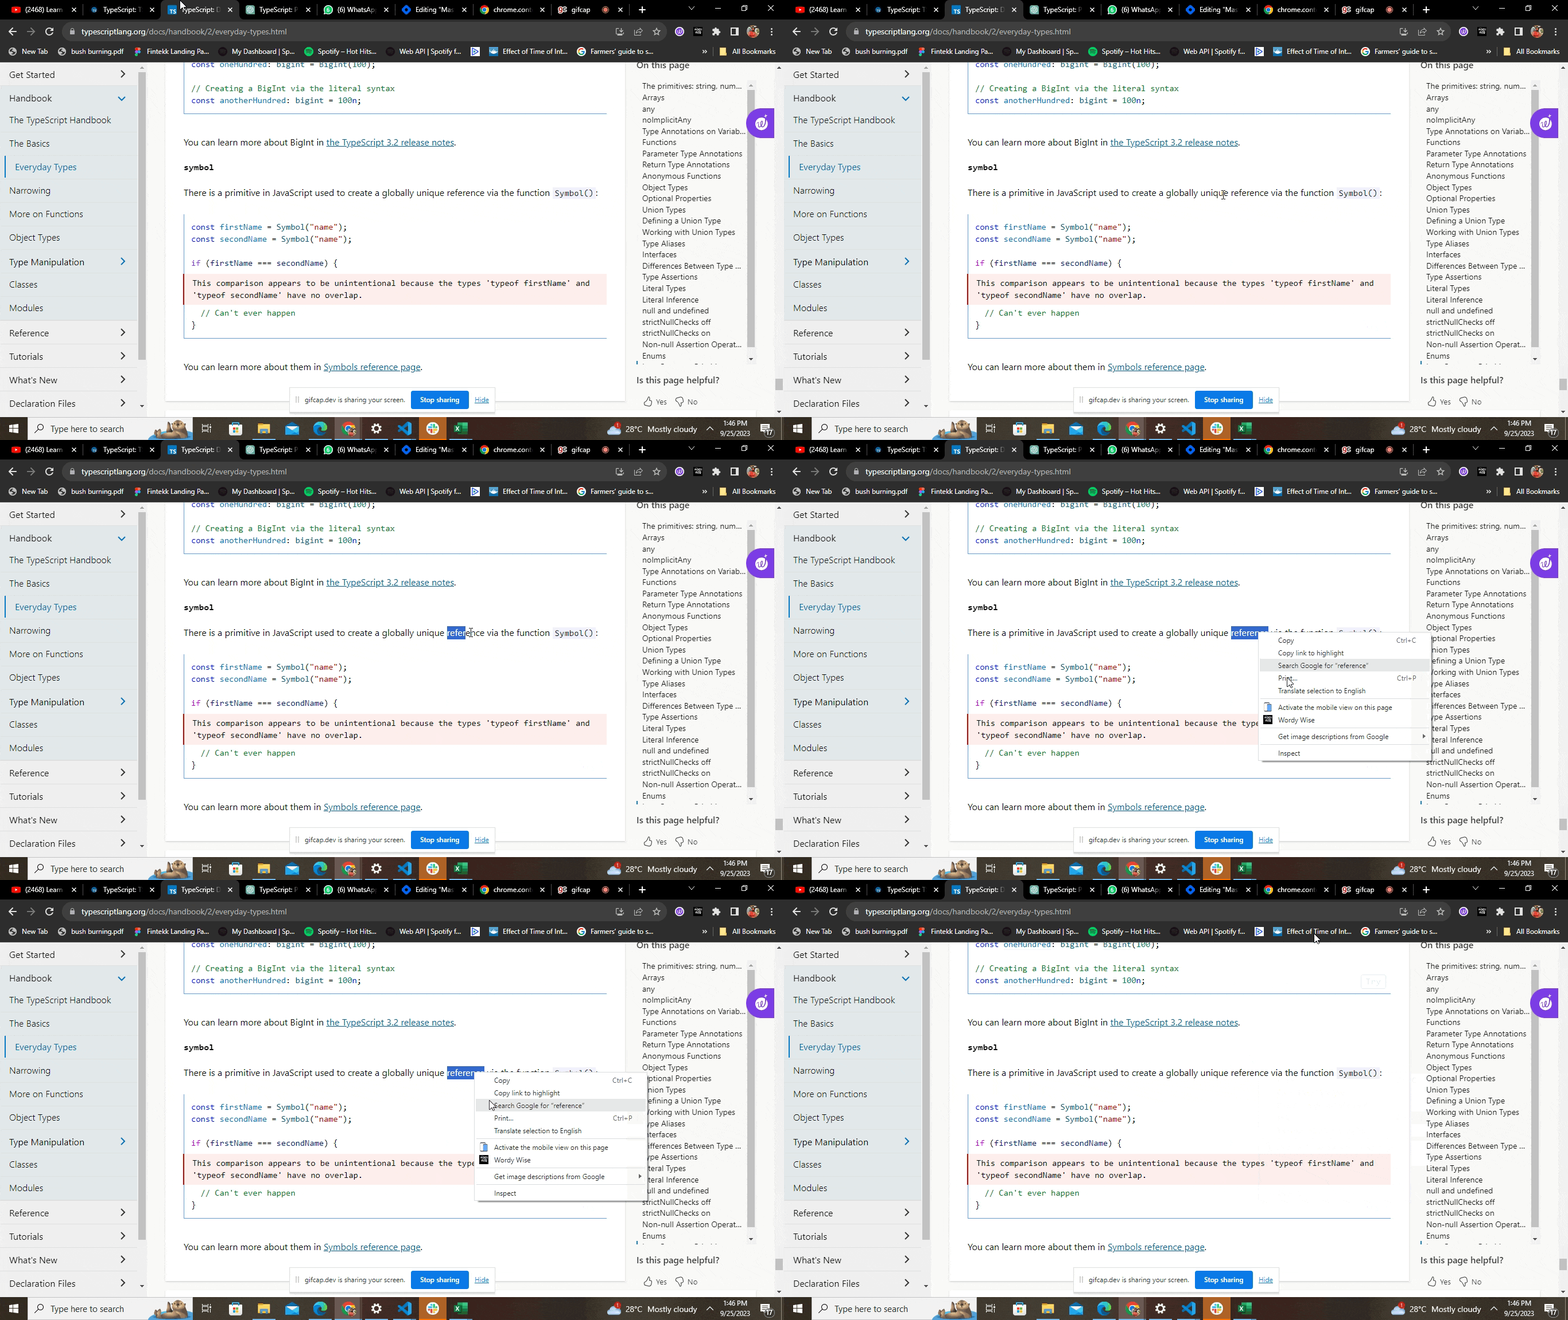
As you can see from the clip above, simply creating this object with the create method, our contentMenuItem appears on the screen after we highlight and right-click on our mouse.
Note: Your contextMenuItem can only appear on the list if you select a text by highlighting it.
Store Values selected by the User via ContextMenuItem
Chrome ContextMenus comes with an event called onClicked which has a listener function called addListener( ). This function is executed when you click on the contextMenuItem as it appears on the list.
chrome.contextMenus.onClicked.addListener(function(clickData){
    if(clickData.menuItemId === "wordyWise" && clickData.selectionText){
        chrome.storage.sync.set({"word":clickData.selectionText})
    }
})
The addListener function takes in a callback function with "clickedData" as a parameter. ClickedData will contain all the information about the context menu item that has been clicked on.
The if statement above checks if the menuItem I clicked on has the id wordyWise and if the user highlighted any text at all, if these two conditions result in true, I will be able to store the selected word in Chrome storage using the Chrome Storage API.
chrome.storage.sync.set({key : value } )
There are four types of chrome storage buckets, which are:
chrome.storage.locale
chrome.storage.sync
chrome.storage.session
chrome.storage.managed
The chome.storage.sync bucket ensures that the data is stored on chrome and will be available across any Chrome browser that the user is logged into.
Fetch word definition
Now this is where you want to fetch the word that was selected by the user from chrome storage, get their meanings using a dictionary API and display the word meaning to the user.
I wrote this code in the content.js file because this was code that would be on the DOM. Just like the chrome storage API has a set method it also has a get method. The get method automatically pulls whatever was stored in the Chrome storage as soon as you open up your Chrome browser.
chrome.storage.sync.get("key",function)
You will specify the key you used to store your item in chrome storage as the first parameter, and also specify a callback function. The key will return the value that was stored and the function written may be what you want to do with the value fetched from the chrome storage.
let definition1 = document.querySelector("#definition1")
let definition2 = document.querySelector("#definition2")
let example1 = document.querySelector("#example1")
let example2 = document.querySelector("#example2")
let selectedWord = document.querySelector("#word")

chrome.storage.sync.get("word",function(dictionary){
    selectedWord.textContent = dictionary.word
    const checkWord = async () => {
        definition1.textContent = "loading..."
        try {
          const response = await fetch(`https://api.dictionaryapi.dev/api/v2/entries/en/${dictionary.word}`);

          const data = await response.json();
            definition1.textContent = data[0].meanings[0].definitions[0].definition;
            definition2.textContent = data[0].meanings[0].definitions[1].definition;
            example1.textContent = data[0].meanings[0].definitions[0].example;
            example2.textContent = data[0].meanings[0].definitions[1].example;


        } catch (error) {
            definition1.textContent = "An error ocurred please try again later"
        }
      };
      checkWord()
})
From the code above , when the data is retrieved from the storage it is passed as an object to the callback function and that object contains all the information about the stored word. In this case, I named the object dictionary. dictionary.word accesses the value associated with the word key in the dictionary object, word is the key used to store specific data that was selected by the user in Chrome's synchronized storage. The value associated with the "word" key is then used to populate the textContent of various HTML elements with the Id selectedWord.
The checkword function fetches the meaning of the word from the Dictionary API and I was able to populate my HTML elements that will display the meaning of the words and how they can be used in examples to the user.

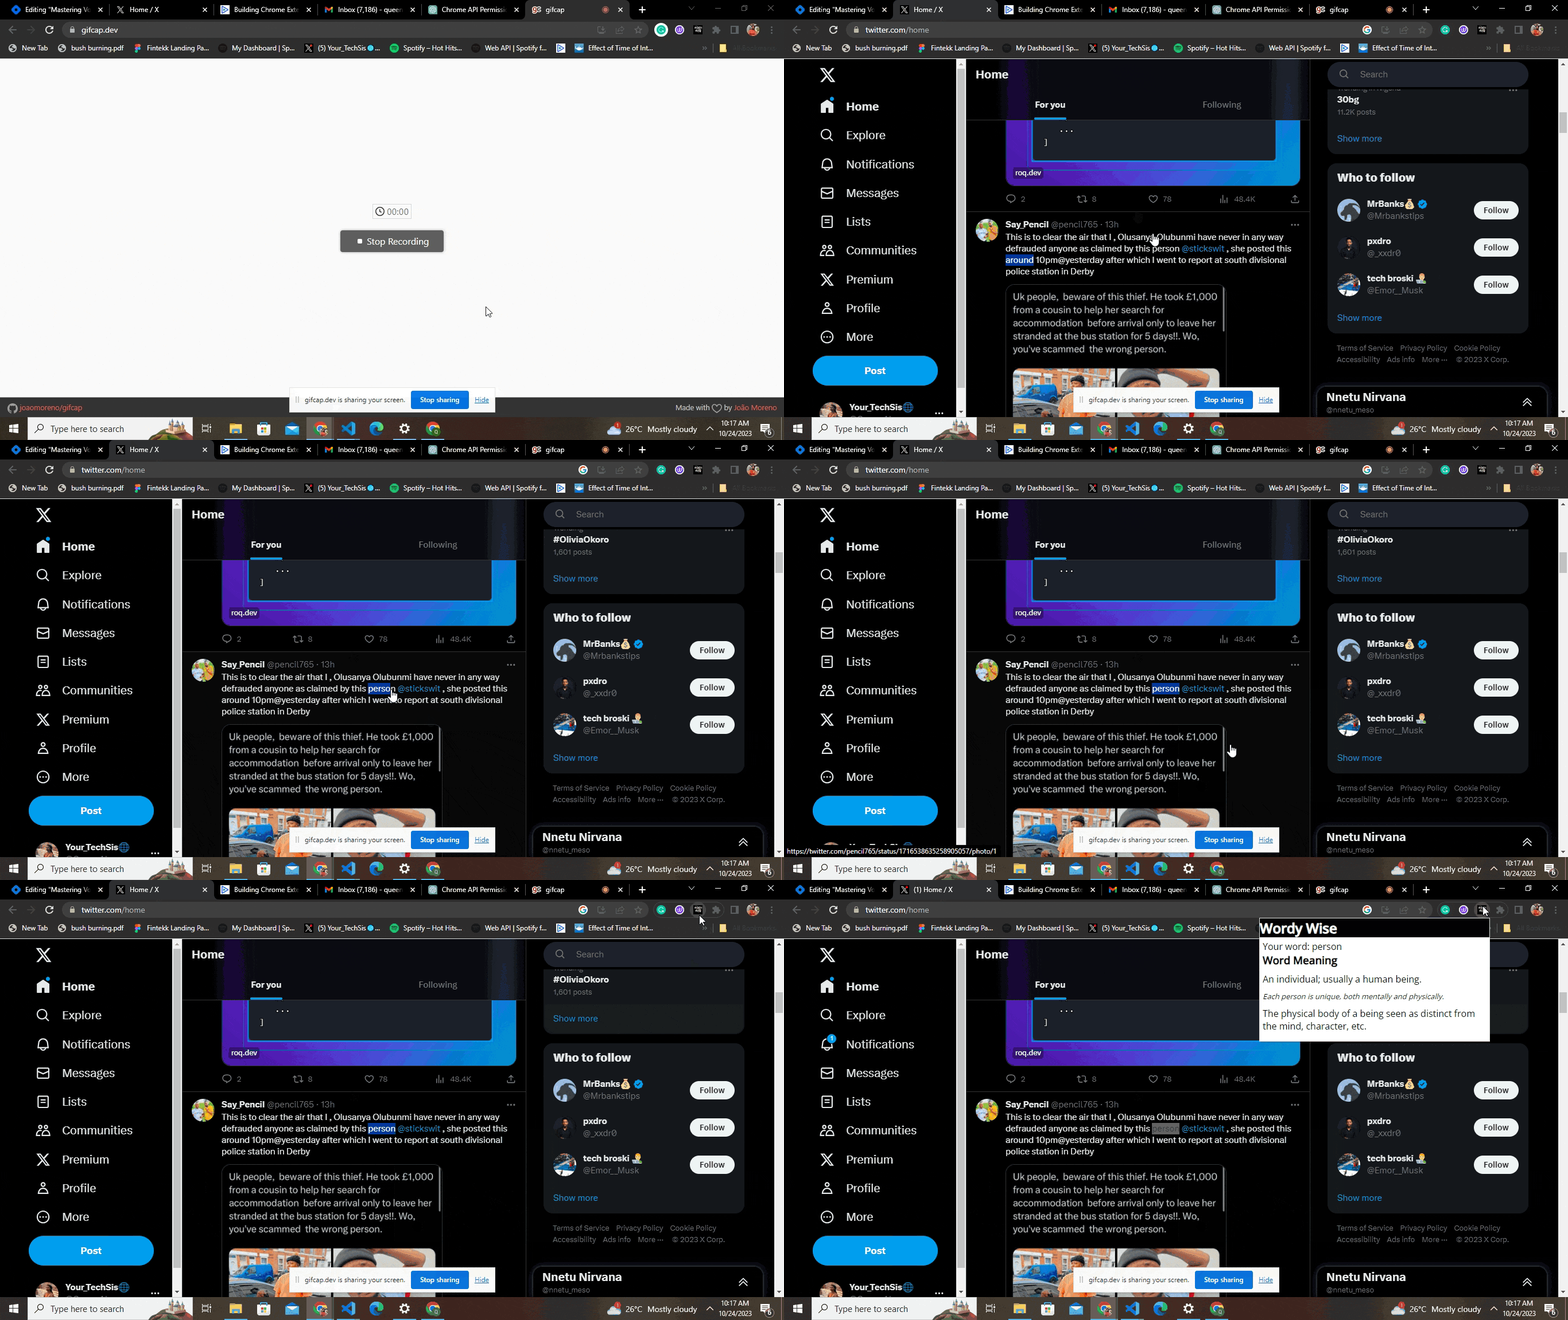
The clip above shows a clear example of how this Chrome extension works. I think it is very user-friendly and does what it is supposed to do. This way, you do not have to leave your current web page when trying to find out the meaning of a certain word.
Conclusion
Thank you for reading thus far, I hope you learned a thing or two and this article could help you build your very first Chrome extension as well.
